This is a stickied post. Scroll down for recent posts.
This blog post is a simple guide to SDR, which is Software Defined Radio. There is a lot of material on the internet about SDR, so I am not going to go into a lot of detail, only how to do what is needed to receive radio transmissions.
Software Defined Radio is a radio that uses software on a computer or electronic device to process radio signals, replacing analog radio components with digital processing. A receiver or transceiver is needed to pickup or transmit radio signals. We are only interested in receiving radio signals, which is the easiest and cheapest way to go.
Getting Started With SDR
Here at watermanatwork.com we try to take the least expensive route whenever possible and there’s no exception here. We buy all this stuff just like you do. I want to install SDR on my laptop computer and Chromebook, so I want a receiver that will work with both.
I bought the RTL-SDR Blog v4. Not a tough decision because it’s a cheap, reliable SDR receiver that’s very popular. There’s a ton of information available and it works with most of the popular SDR software. It covers from 500kHz to over 1.7GHz. I will be fooling around with antennas later, but I want to have the SDR up and running as soon as I get it, so I spent a little bit more and got the antenna with it.
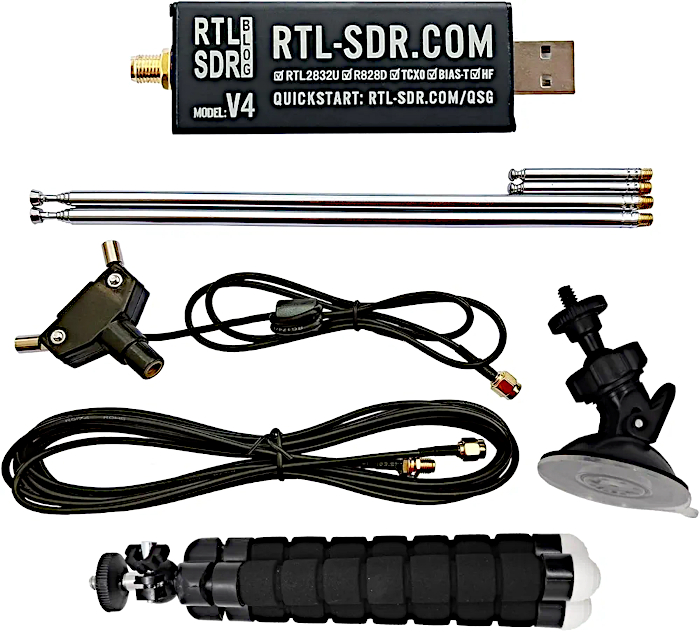
With Software Defined Radio, as you might imagine, software is pretty important. Fortunately, the most popular software programs are free. SDR # (SDR Sharp) and SDR++ (SDR Plus Plus) were the two that looked good to me. Both supposedly have built in drivers for the RTL-SDR Blog v4 receiver(dongle). There are other software packages that have more features, but I want to keep it simple at first.
I opted for SDR++. An important thing for me is that it is cross-platform and I can install it on my Windows 10 laptop and Asus Chromebook. I downloaded the SDR++ installation files for Windows and the Chromebook along with a PDF SDR++ User Guide.
I’m still waiting for the RTL-SDR Blog v4 receiver, but I decided to install the SDR++ software to check it out. I don’t have my Windows laptop with me, so the Asus Chromebook is the first into the fire.
SDR with Linux
The Chromebook runs ChromeOS, but it has a Debian Linux “sandbox” environment that runs Linux programs. With the Linux environment active, download the correct file from the SDR++ repository for your system to the Linux directory. I have Linux Debian Bookworm on the Chromebook, the installation file is sdrpp_debian_bookworm_amd64.deb.

Right click on the file, click “Install with Linux” and your work is done. Of course, installations are going to be different on different devices, but this is a standard issue Chromebook and the Linux installation couldn’t have been easier.
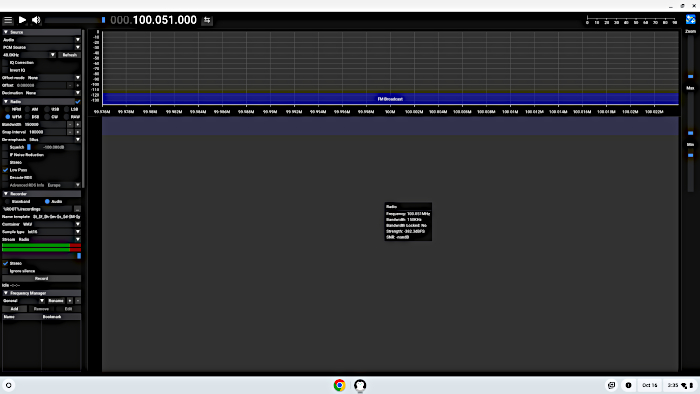
The RTL-SDR Blog v4 receiver finally arrived with all the accessories intact. SDR++ was installed and I was ready to plug the RTL-SDR into the Chromebook and get going.
This Chromebook I’m using has a Debian Linux environment, pretty much a “sandbox” kind of deal. It will run Debian Linux software, but there is no operating system. Chromebooks in general, this one included, are not real powerful, so it may have to work pretty hard to process data from the RTL-SDR receiver.
I connected a small desktop dipole antenna using the antenna kit that came with the RTL-SDR dongle. Not much of an antenna, but should be enough to see if the RTL-SDR dongle is working. I plugged the receiver into the USB port of the laptop and, nothing.
Here’s a few things about a Linux installation that may need to be done:
USB is not native to Linux. Check USB settings to enable the SDR dongle.

If SDR++ installs but does not recognize RTL-SDR USB dongle, device drivers may have to be manually installed. The code to install the drivers is on the RTL-SDR Blog website.
Start SDR++, then plug in the RTL-SDR USB receiver.
I had to do all these things to get RTL-SDR and SDR++ working on the Chromebook. When I got everything squared away, Linux-wise, I tuned into a local FM radio station.
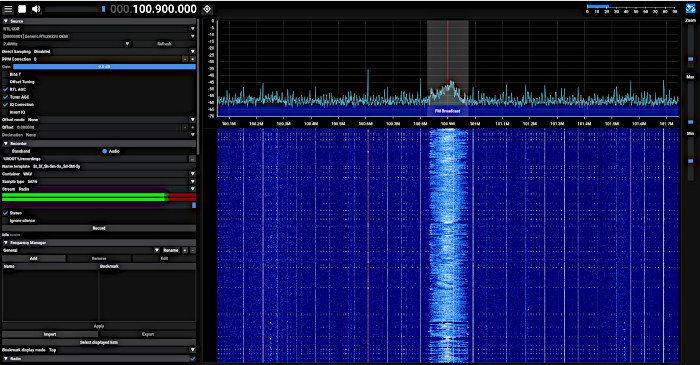
Even with a small antenna a long way from the FM radio transmitter, I was able to get an audible signal. If you are having trouble getting a signal, check the “RTL AGC” and/or “Tuner AGC” in the menu box on the left. Adjust the signal with the sliders on the top right of the screen.
The RTL-SDR dongle and SDR++ are working and the mighty Asus Chromebook seems to do a pretty good job of processing signals. What I need to get better signals is a better antenna. I’m playing around with the antenna that came with the dongle and it does a pretty good job for what it is. The general strategy with SDR is to decide what you want to listen to and build or buy an antenna for that band or frequency. No one antenna will cover all the bandwidth the RTL-SDR can receive.
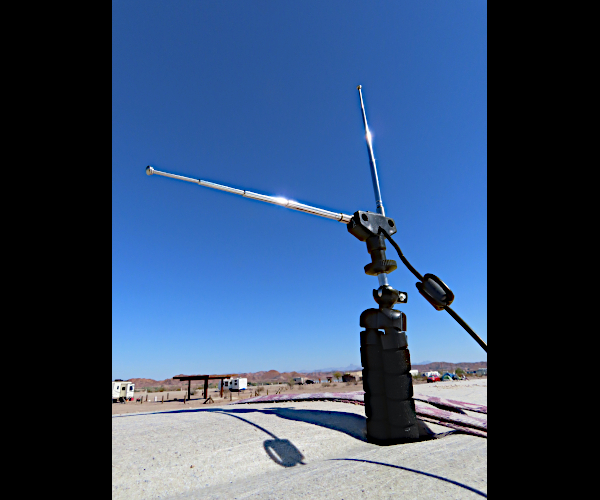
Since all I have right now is the antenna that came with the RTL-SDR receiver, I’m going to see what I can do with that. I’m out in the desert with a fishing kayak on my truck so I stuck the antenna/flexible tripod in one of the scupper holes.
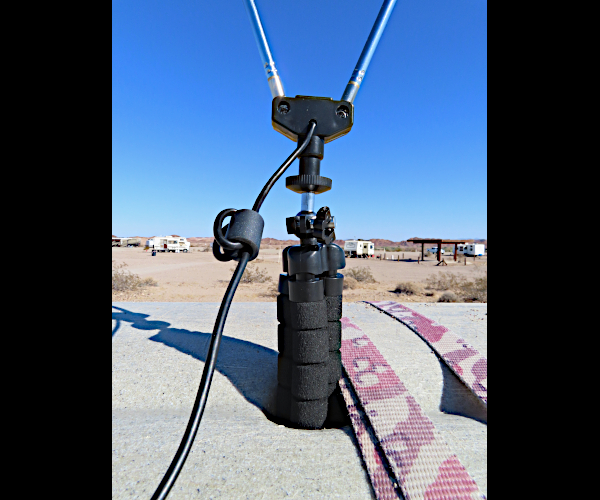
This put the antenna about nine feet off the ground, which should receive most of the available radio signals. I got the best results with this sort of dipole antenna with one long arm and one short one. By changing the lengths of the antenna arms and orientation of the antenna, I could get better reception on different frequencies.
The FM broadcast station I was barely receiving with the small desktop antenna was coming in loud and clear with the larger antenna on the roof of the truck.
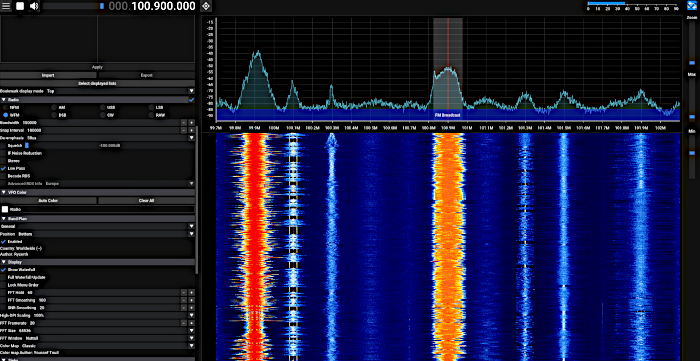
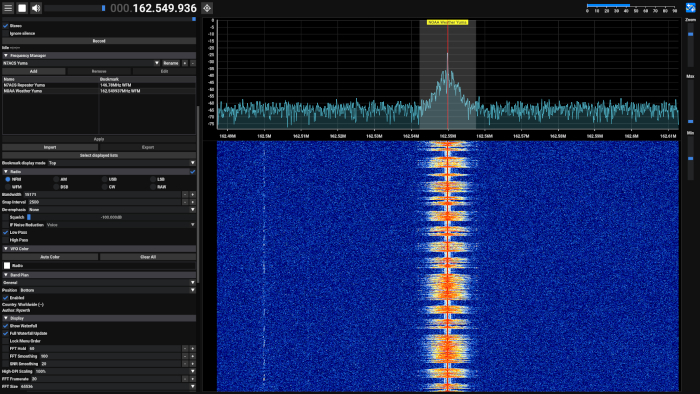
I was stoked to see this because that means everything is pretty much working like it should. I tried one more station, the NOAA weather radio station I can’t receive with my handheld ham radio transceiver.
It came in loud and clear. This station broadcasts in “NFM”, which is Narrow FM. Changing between NFM and WFM(Wide FM) in the menu box can help dial in a signal.
Good to go with SDR on the Chromebook. Now, on to the Windows 10 laptop. I have a Lenovo Legion 5 laptop with Windows 10 Home. It has more than enough resources for SDR devices and programming.
SDR with Windows 10
I am going to install SDR++ on the Windows 10 laptop just like the Chromebook with Linux. I downloaded the Windows x64 version of SDR++ along with the Linux version and instruction manual. The sdrpp_windows_x64.zip archive can be extracted to a folder of your choosing. Make a desktop shortcut to “sdrpp.exe” and it’s ready to run.
Installing the RTL-SDR Blog v.4 USB device drivers is a little trickier. Go to the rtl-sdr.com Quick Start Guide. Read and follow the directions carefully.
When I ran the install-rtlsdr.bat file, as per directions, the required rtlsdr.dll file downloaded into the folder where SDR++ is installed, but the required zadig.exe did not. I did that manually by downloading the latest version from the Zandig website.
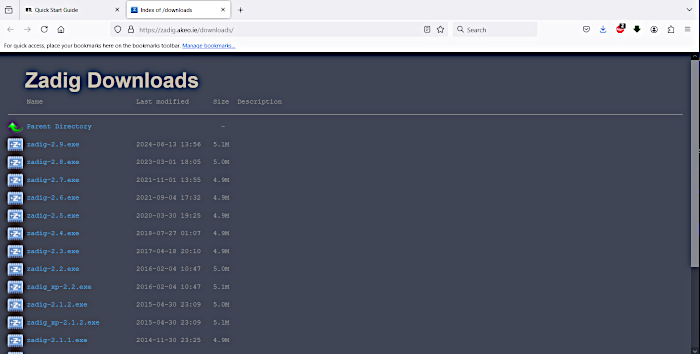
Be careful using Zadig, you don’t want to accidently overwrite any of your device drivers. With the device drivers installed and the RTL-SDR dongle plugged in, I opened SDR++. The RTL-SDR receiver was recognized and after a few adjustments I learned from the Chromebook install, there was a strong signal from the local FM broadcast station.
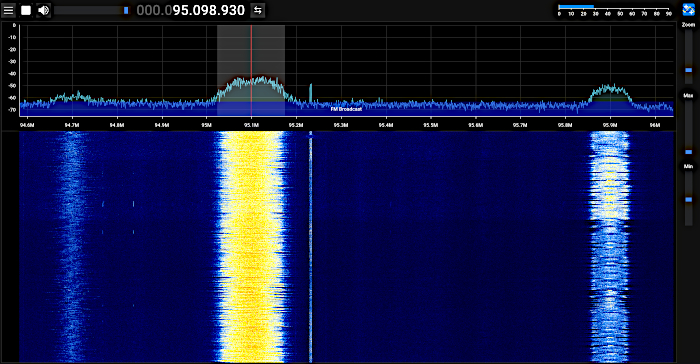
You may notice the signal for the FM broadcast stations is much different than the same FM broadcast stations on the Chromebook. That’s because the RTL-SDR dongle is connected to a dual band VHF/UHF ham radio antenna. It is tuned to the 70cm/2m ham radio bands so it doesn’t do as good a job with the FM broadcasts. The antenna that came with the dongle works better for the FM broadcasts but not so well with VHF/UHF.
The difference the antenna makes can also be seen with the NOAA weather radio broadcast. Compare the image below with the dual band antenna compared to the NOAA image above where the kit antenna was used.
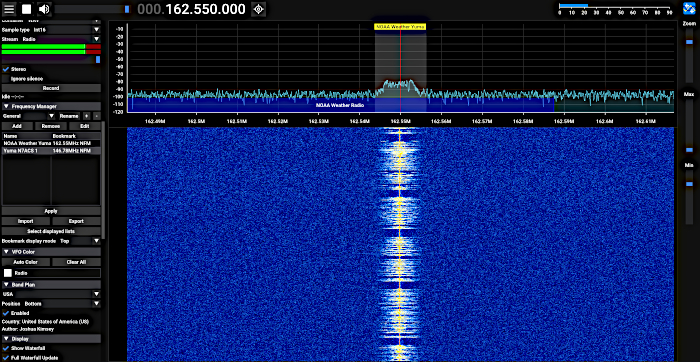
SDR++ and STL-SDR receiver successfully installed on the Chromebook and Windows 10 laptop. Now I need to figure out what I want to listen to and start making antennas.
That does it for basic SDR operation. There will be more SDR stuff coming, so I’ve made a separate category for it here on the watermanatwork.com blog. Check back soon because I already have some new hardware to explore the electromagnetic spectrum.
